Guitar
How To Read Guitar Tabs – Part 2
In our last post, we looked at the basics of reading guitar tabs. This time we’re looking at the more advanced techniques you’ll need to learn to take your guitar playing to the next level.
What do all the letters mean?
If you’ve looked at a few guitar tabs, you’ve probably noticed a few letters in amongst the numbers. These represent techniques that are common in guitar music, especially when it comes to guitar solos.
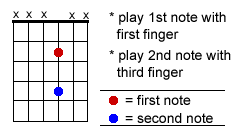
h stands for ‘hammer-on’. This means playing one note and then ‘hammering’ another finger further up the fretboard to play another note. Here’s a tab to demonstrate:
e-----------------------------|
B-----------------------------|
G------10h12--------10h12-----|
D-----------------------------|
A-----------------------------|
E-----------------------------|
So in the above example, you would play the 10th fret on the G string, then sound the 12th fret by hammering your third finger on it. Your plectrum shouldn’t touch the string for the second note – your ‘hammer’ finger is doing all the work.
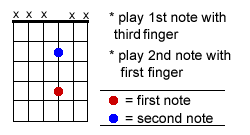
p stands for ‘pull-off’ – the opposite of a hammer-on. This simply means pulling your finger off the fretboard after sounding a note. Here’s the tab:
e-----------------------------|
B-----------------------------|
G------12p10--------12p10-----|
D-----------------------------|
A-----------------------------|
E-----------------------------|
So here, you need to start with two fingers on the same string: your first finger on the 10th fret, and your third finger on the 12th fret.
Sound the note at the 12th fret, and then pull your third finger away from the string. ‘Pulling off’ the 12th fret will cause the 10th fret to be played.
Sometimes, you’ll see a tab that asks for both a hammer-on and a pull-off to be played. It looks like this:
e-----------------------------|
B-----------------------------|
G------10h12h10---------------|
D-----------------------------|
A-----------------------------|
E-----------------------------|
This is simpler than it looks: just play the hammer-on, then quickly remove the third finger to play another note.
s stands for ‘slide’. As the name suggests, this means sliding your finger up the fretboard. Here’s an example:
e-----------------------------|
B-----------------------------|
G------10s12------------------|
D-----------------------------|
A-----------------------------|
E-----------------------------|
So all you need to do here is sound the note at the 10th fret, then slide your finger up to the 12th fret. This will sound similar to a hammer on, but a little bit smoother.
b stands for ‘bend’. This simply means playing a note and then bending the string to achieve a higher note. Take a look at this example.
e-----------------------------|
B-----------------------------|
G------10b12------------------|
D-----------------------------|
A-----------------------------|
E-----------------------------|
You don’t actually play the 12th fret here – you simply bend the string at the 10th fret until it reaches the pitch of the 12th fret. It can be difficult to do with just one finger, so try using another supporting finger to help you.
All this takes practice to get right, so it’s a good idea to get a guitar teacher to show you.
Different tunings
Sometimes you will come across guitar tabs that don’t feature the standard ‘EADGBe’ tuning. These are alternative tunings and they are great for getting a different sound from your guitar. Here’s an example:
D----0------------------------|
A----0------------------------|
F#---0------------------------|
D----0------------------------|
A----0------------------------|
D----0------------------------|
The above tuning (DADF#AD) is probably the most common alternative tuning – open D. It’s called open D because when played ‘open’ (no fingers on frets) it creates a D chord.
Other common tunings include open G (DGDGBD) and drop D (DADGBE). Alternative tunings make it easier to get a different kind of vibe from your guitar.
Ghost notes
Many of the guitar tabs you’ll find online don’t show you all of the notes you need to play – they’re more of a rough guide. It can help to have the song playing on a computer or MP3 player while you read the tabs.
‘Ghost notes’ are the subtle notes that join together different parts of a riff. You might not always see them on a guitar tab, but you should hear them if you listen to the song really closely. A classic example is Wonderwall by Oasis, which is often transcribed like this:
e---3--3--3--3-3-3-3-3--3--3-3--3-3-3--3--3-3-3--3--3-3-3-3-3-3-3----|
B---3--3--3--3-3-3-3-3--3--3-3--3-3-3--3--3-3-3--3--3-3-3-3-3-3-3----|
G---0--0--0--0-0-0-0-0--0--0-0--0-2-2--2--2-0-0--0--0-0-0-0-0-0-0----|
D---2--2--2--2-2-2-0-0--0--0-0--0-0-0--0--0-0-2--2--0-2-2-0-2-2-0----|
A---2--2--2--2-2-2-2-2--2--2-2----------------0--0----0-0-0-0-0------|
E---0--0--0--0-0-0-3-3--3--3-3---------------------------------------|
But really it should look a little more like this:
e---3-----3--3-3-3---3--3--3-3--3-3-3--3--3-3-3--3--3-3-3-3-3-3-3----|
B---3-----3--3-3-3---3--3--3-3--3-3-3--3--3-3-3--3--3-3-3-3-3-3-3----|
G---0-----0--0-0-0---0--0--0-0--0-2-2--2--2-0-0--0--0-0-0-0-0-0-0----|
D---2-----2--2-2-2---0--0--0-0--0-0-0--0--0-0-2--2--0-2-2-0-2-2-0----|
A---2-----2--2-2-2---2--2--2-2----------------0--0----0-0-0-0-0------|
E---0--0--0--0-0-0-3-3--3--3-3---------------------------------------|
Notice the two single notes near the beginning of the tab? These are two very light notes that pin the riff together. But because it’s so subtle, tabs with the whole chord are often a lot easier for beginners.
It’s then up to you to figure out exactly how it’s played – and it’s one of the most enjoyable parts of learning guitar.
Of course, guitar lessons with a good teacher can make things much easier. That’s where I step in – get in touch to book your first lesson.